blog
How to Add MiniMax MCP Tools to OpenCode - Blog - Naufaldi Rafif Satriya
Extend OpenCode with MiniMax MCP server to add web search and understand image capabilities for enhanced AI-assisted coding.
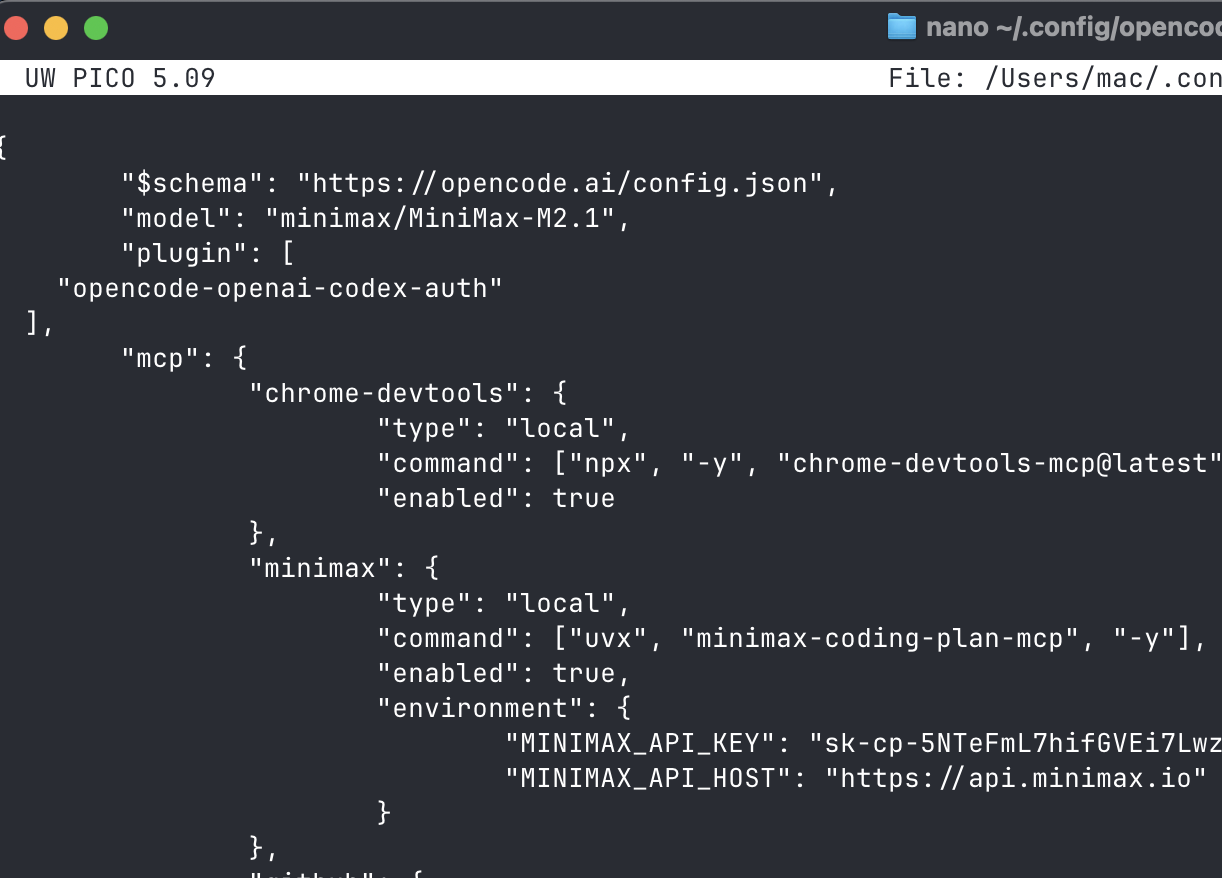
The Model Context Protocol (MCP) allows OpenCode to access external tools and services. This guide shows you how to add the MiniMax MCP server to OpenCode, giving your AI assistant the ability to search the web and analyze images directly within your coding workflow.
What You'll Get
After completing this guide, OpenCode will have access to two powerful MiniMax tools:
- web_search: Search the web for documentation, examples, and solutions
- understand_image: Analyze and understand images (screenshots, diagrams, UI mockups)
These tools are particularly useful for:
- Finding up-to-date documentation and API references
- Analyzing UI/UX screenshots
- Understanding architecture diagrams
- Debugging visual issues
Prerequisites
Before starting, ensure you have:
- OpenCode installed with MiniMax configured (see How to Setup MiniMax in OpenCode)
- A MiniMax Coding Plan subscription with API key
- Python environment (for MCP server installation)
Understanding MCP in OpenCode
MCP (Model Context Protocol) is a standard for connecting AI assistants to external tools. OpenCode supports both local and remote MCP servers. The MiniMax MCP server is a Python-based local server that runs via uvx and exposes tools to OpenCode.
For more details, see the OpenCode MCP documentation.
Step 1: Install uv (to get uvx)
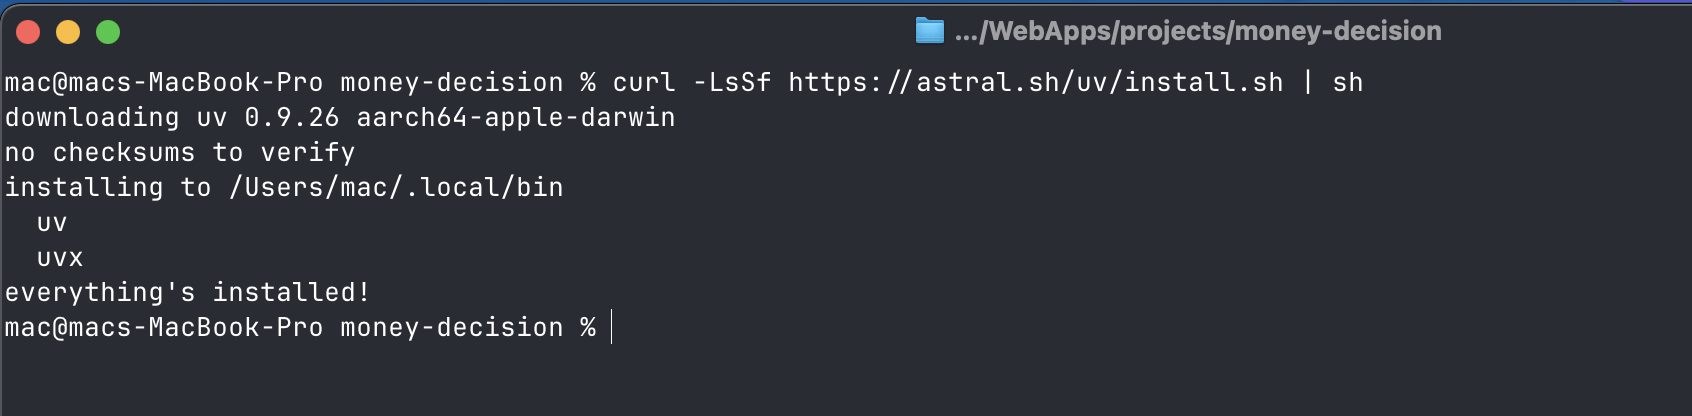
The MiniMax MCP server is executed via uvx, a command-line tool from the uv package manager. Think of it like npx for Python—it runs executables in isolated environments.
Install on macOS/Linux
curl -LsSf https://astral.sh/uv/install.sh | sh<!-- Screenshot: Installing uv on macOS/Linux --> <!-- -->
Install on Windows
powershell -ExecutionPolicy ByPass -c "irm https://astral.sh/uv/install.ps1 | iex"Important: Close and reopen your terminal (or start a new terminal session) to ensure the uvx command is available in your PATH.
Verify uvx is Available
After restarting your terminal, verify that uvx is in your PATH:
macOS/Linux:
which uvxWindows:
(Get-Command uvx).sourceYou should see a path to the uvx executable (e.g., /usr/local/bin/uvx or C:\Users\YourName\.local\bin\uvx).
If you see spawn uvx ENOENT errors later, it means uvx is not in your PATH. You'll need to provide the absolute path to uvx in the config.
Step 2: Configure MiniMax MCP in OpenCode
Now you'll add the MiniMax MCP server to OpenCode's configuration file.
Open the OpenCode Config File
The config file is located at ~/.config/opencode/opencode.json. Open it in your text editor:
# macOS/Linux
nano ~/.config/opencode/opencode.json

# Or use your preferred editor
code ~/.config/opencode/opencode.json
Add the MiniMax MCP Server
Add the following configuration to the mcp section (create the section if it doesn't exist):
{
  "$schema": "https://opencode.ai/config.json",
  "mcp": {
    "minimax": {
      "type": "local",
      "command": ["uvx", "minimax-coding-plan-mcp"],
      "enabled": true,
      "environment": {
        "MINIMAX_API_KEY": "<YOUR_MINIMAX_API_KEY>",
        "MINIMAX_API_HOST": "https://api.minimax.io"
      }
    }
  }
}
After saving your configuration, restart your terminal (or start a new terminal session) to ensure OpenCode loads the MCP configuration.
Verify MCP Connection
To verify that the MiniMax MCP server is properly connected, start OpenCode and use the /mcp command:
cd /path/to/your/project
opencode
Once OpenCode is running, type /mcp in the chat. You should see the MiniMax MCP tools listed:
minimax_web_searchminimax_understand_image
If you see these tools, your MCP server is successfully connected!

Configuration Fields Explained
| Field | Description | | ------------- | ----------------------------------------------------------------- | | type | Must be "local" for locally-run MCP servers | | command | Command to start the server: ["uvx", "minimax-coding-plan-mcp"] | | enabled | Set to true to enable the server on startup | | environment | Environment variables passed to the MCP server |
Environment Variables
| Variable | Required | Description | | --------------------------- | -------- | ---------------------------------------------------------------------------------------------------- | | MINIMAX_API_KEY | Yes | Your MiniMax Coding Plan API key | | MINIMAX_API_HOST | Yes | Always https://api.minimax.io | | MINIMAX_MCP_BASE_PATH | No | Absolute path to writable output directory (only needed if MINIMAX_API_RESOURCE_MODE is "local") | | MINIMAX_API_RESOURCE_MODE | No | "url" (default) or "local" - how generated resources are exposed |
Replace <YOUR_MINIMAX_API_KEY> with your actual API key.
Note: For most use cases, you only need MINIMAX_API_KEY and MINIMAX_API_HOST. The base path is only required if you set the resource mode to "local" and want to store image outputs locally.
Optional: Using Environment Variables for API Key
For better security, you can reference environment variables in the config:
{
  "mcp": {
    "minimax": {
      "type": "local",
      "command": ["uvx", "minimax-coding-plan-mcp"],
      "enabled": true,
      "environment": {
        "MINIMAX_API_KEY": "{env:MINIMAX_API_KEY}",
        "MINIMAX_API_HOST": "https://api.minimax.io"
      }
    }
  }
}
Then set the environment variable in your shell:
export MINIMAX_API_KEY="your-api-key-here"Optional: Local File Storage Mode
By default, the MCP server uses "url" mode for resources. If you need to store image outputs locally instead:
- Create a writable output directory:
mkdir -p ~/minimax-mcp-output- Add these environment variables to your config:
{
  "environment": {
    "MINIMAX_API_KEY": "<YOUR_MINIMAX_API_KEY>",
    "MINIMAX_API_HOST": "https://api.minimax.io",
    "MINIMAX_MCP_BASE_PATH": "/Users/yourname/minimax-mcp-output",
    "MINIMAX_API_RESOURCE_MODE": "local"
  }
}
Make sure to use an absolute path (not ~) for MINIMAX_MCP_BASE_PATH.
Step 3: Understanding Tool Naming in OpenCode
OpenCode exposes MCP tools with a naming convention: <serverName>_<toolName>.
Since you named your server "minimax", the tools will be available as:
minimax_web_searchminimax_understand_image
When prompting OpenCode, you'll reference these tool names explicitly.
Step 4: Test the MCP Tools
Start OpenCode in your project directory:
cd /path/to/your/project
opencode
Test web_search
Try a prompt asking OpenCode to use minimax MCP for searching:
Use minimax MCP to search for the latest React 19 featuresOpenCode will automatically invoke the minimax_web_search tool.
<!-- Screenshot: OpenCode using minimax_web_search --> <!-- -->
Test understand_image
For image understanding, ask OpenCode to use minimax MCP with your image path:
Use minimax MCP to analyze this UI screenshot: /path/to/screenshot.pngTool Details
web_search Tool
Performs web searches and returns search results with related queries.
How to use:
Simply say "use minimax MCP" with your search query. OpenCode will automatically invoke minimax_web_search.
Example:
Use minimax MCP to find documentation about Next.js app routerTechnical details:
- Tool name:
minimax_web_search - Parameter:
query(required) - The search query string
understand_image Tool
Performs image understanding and analysis.
How to use:
Simply say "use minimax MCP" with your image path. OpenCode will automatically invoke minimax_understand_image.
Example:
Use minimax MCP to analyze the layout of this design: https://example.com/mockup.pngTechnical details:
- Tool name:
minimax_understand_image - Parameters:
prompt(required): Question or analysis taskimage_url(required): Image source (HTTP/HTTPS URL or local file path)- Supported formats: JPEG, PNG, GIF, WebP (max 20MB)
Practical Usage Tips
Here are effective ways to use the MiniMax MCP tools in your daily coding workflow.
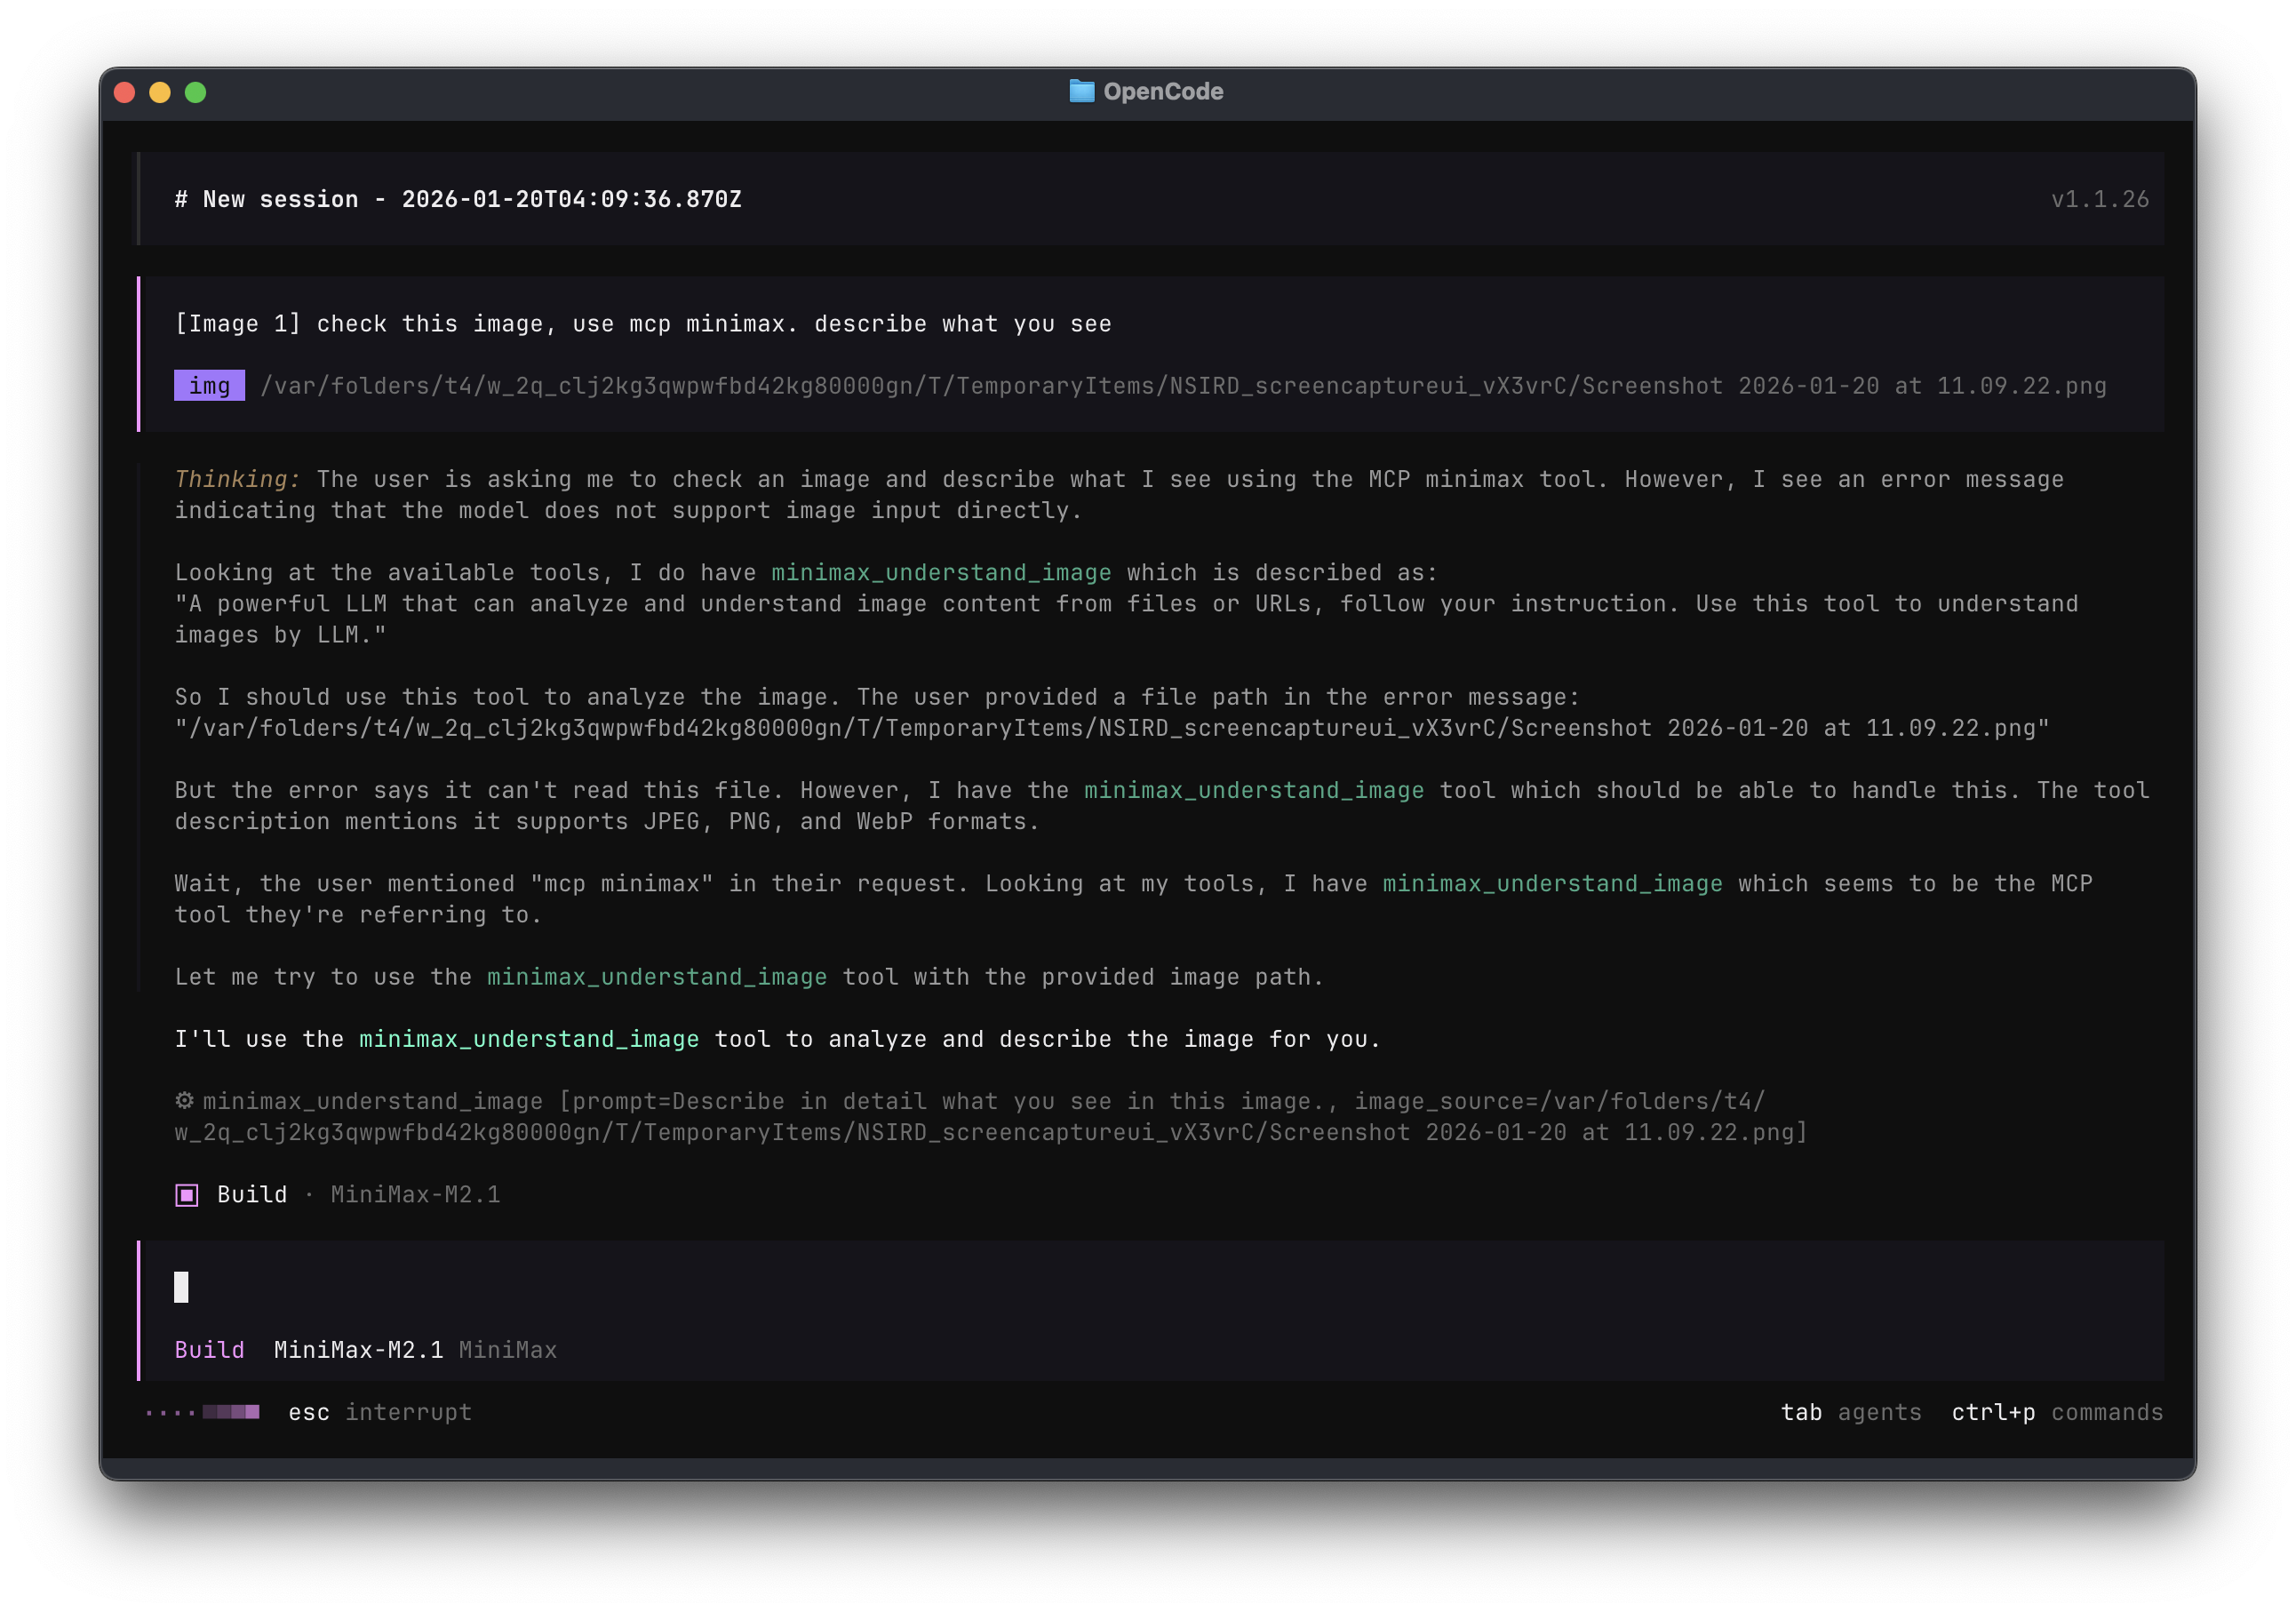
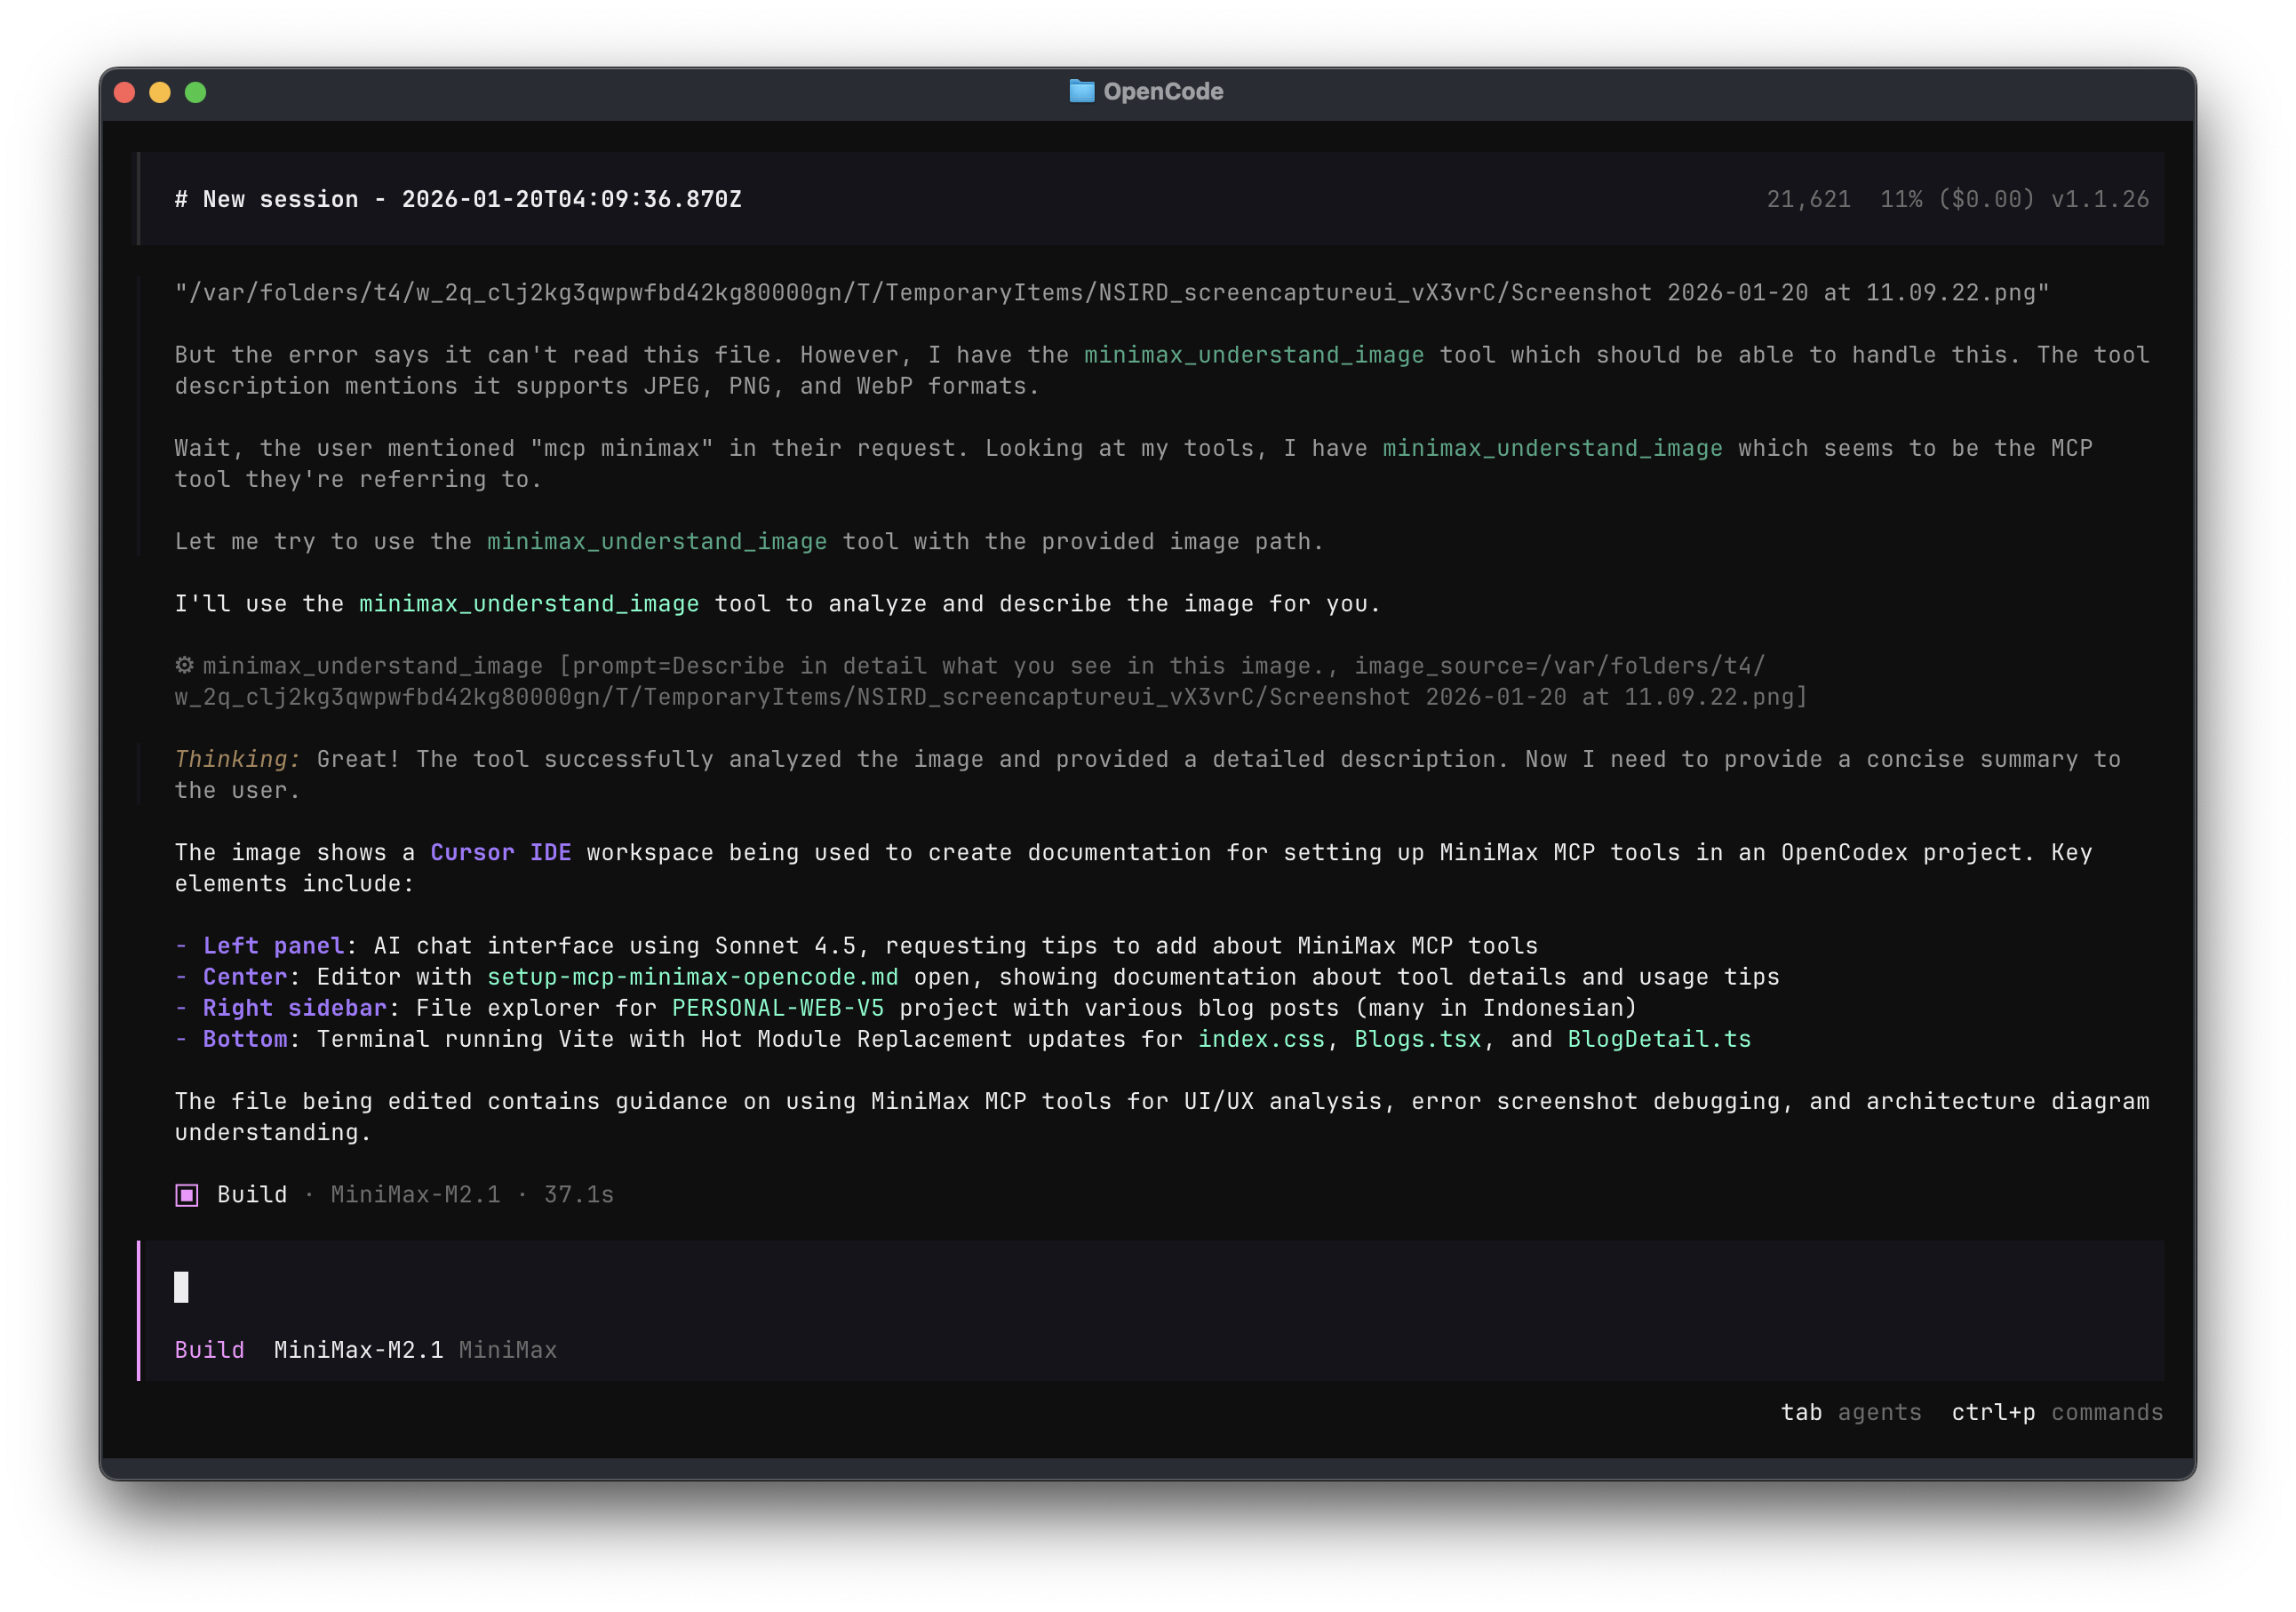
Important: You need to explicitly ask OpenCode to "use minimax MCP" in your prompts. OpenCode won't automatically use the MCP tools unless you mention it. The good news is you don't need to specify which tool—OpenCode will automatically choose minimax_understand_image or minimax_web_search based on your request.
Using understand_image
Simply say "use minimax MCP" and OpenCode will automatically invoke the image understanding tool:
Simple image analysis:
Use minimax MCP to check this image and describe what you see: /path/to/screenshot.pngUI/UX analysis:
Use minimax MCP to analyze the layout and design patterns in this mockup: https://example.com/design.pngError screenshot debugging:
I'm getting an error. Use minimax MCP to look at this screenshot and help me debug: /path/to/error.pngAccessibility review:
Use minimax MCP to review this UI screenshot for accessibility issues: /path/to/interface.pngArchitecture diagram understanding:
Use minimax MCP to explain the architecture shown in this diagram: /path/to/architecture.pngUsing web_search
Simply say "use minimax MCP" and OpenCode will automatically invoke the web search tool:
Documentation lookup:
Use minimax MCP to find the latest Next.js 15 server actions documentationAPI reference:
Use minimax MCP to find the current Stripe API documentation for payment intentsError solutions:
Use minimax MCP to search for solutions to "Module not found: Can't resolve 'react-dom/client'"Best practices:
Use minimax MCP to find current best practices for React Server Components in 2026Package comparison:
Use minimax MCP to compare Zustand and Redux in 2026Pro Tips
- Always say "use minimax MCP": Start your prompt with this phrase to ensure the MCP tools are invoked
- Be specific about what you want: Instead of "check this image", say "use minimax MCP to check this image and identify all UI components"
- OpenCode chooses the right tool: You don't need to specify
minimax_understand_imageorminimax_web_search—OpenCode automatically picks the correct tool based on your request - Combine tools in one conversation: Ask to analyze an image, then search for related information—all using "use minimax MCP"
- Context matters: Provide context about what you're building or debugging for better results
Example conversation:
You: I'm building a dashboard. Use minimax MCP to check this mockup and tell me what components I need: /path/to/dashboard.png

OpenCode: [Automatically uses minimax_understand_image to analyze]

You: Use minimax MCP to find a good React component library for these charts

OpenCode: [Automatically uses minimax_web_search to find libraries]
Debugging workflow:
You: Use minimax MCP to analyze this error screenshot: /path/to/error.png

OpenCode: [Uses minimax_understand_image]

You: Use minimax MCP to search for solutions to this error

OpenCode: [Uses minimax_web_search]
Troubleshooting
Error: spawn uvx ENOENT
Cause: uvx is not installed or not in your PATH.
Solution:
- Verify
uvxis installed:which uvx(macOS/Linux) or(Get-Command uvx).source(Windows) - If not installed, follow Step 1 to install
uv - If installed but not in PATH, use the absolute path in your config:
{
  "command": ["/absolute/path/to/uvx", "minimax-coding-plan-mcp"]
}
Error: Permission denied or directory not writable
Cause: MINIMAX_MCP_BASE_PATH doesn't exist or isn't writable (only relevant if you set MINIMAX_API_RESOURCE_MODE to "local").
Solution:
- If you don't need local file storage, remove
MINIMAX_MCP_BASE_PATHandMINIMAX_API_RESOURCE_MODEfrom your config - If you do need local mode:
- Verify the directory exists:
ls -la ~/minimax-mcp-output - Create it if needed:
mkdir -p ~/minimax-mcp-output - Check permissions:
chmod 755 ~/minimax-mcp-output - Use an absolute path (not
~shorthand) in the config
Error: Invalid API key or authentication failed
Cause: MINIMAX_API_KEY is incorrect or missing.
Solution:
- Verify your API key at platform.minimax.io
- Check that you're using a Coding Plan API key (not a standard API key)
- Ensure the key is correctly set in the config or environment variable
Tools not showing up in OpenCode
Cause: MCP server failed to start or isn't enabled.
Solution:
- Check
enabled: trueis set in the config - Restart OpenCode: close it and run
opencodeagain - Check OpenCode logs for MCP server startup errors
- Verify the
commandarray is correct:["uvx", "minimax-coding-plan-mcp"]
Timeout errors when fetching tools
Cause: MCP server is taking too long to start (default timeout: 5 seconds).
Solution: Increase the timeout in your config:
{
  "mcp": {
    "minimax": {
      "type": "local",
      "command": ["uvx", "minimax-coding-plan-mcp"],
      "timeout": 10000,
      "enabled": true,
      "environment": { ... }
    }
  }
}
Managing MCP Tools Globally
You can enable or disable MCP tools globally in your OpenCode config using glob patterns.
Disable all MiniMax MCP tools globally
{
  "tools": {
    "minimax_*": false
  }
}
Enable for specific agents only
{
  "tools": {
    "minimax_*": false
  },
  "agent": {
    "research-agent": {
      "tools": {
        "minimax_*": true
      }
    }
  }
}
See the OpenCode MCP documentation for more details on tool management.
Next Steps
Now that you have MiniMax MCP tools configured:
- Use web_search when you need up-to-date documentation or examples
- Use understand_image to analyze UI mockups, debug visual issues, or understand architecture diagrams
- Explore other MCP servers: Check out the OpenCode MCP ecosystem for more tools
- Create custom workflows: Combine MiniMax's coding capabilities with MCP tools for powerful AI-assisted development
References
- MiniMax MCP Guide
- OpenCode MCP Documentation
- MiniMax Coding Plan
- uv Package Manager